How to Export Your Google Analytics Data Before You Switch Tools
 Leon Bauer
·
·
·
7 min read
Leon Bauer
·
·
·
7 min read

Picture this. You have finally decided to leave Google Analytics. Maybe the interface drives you up the wall, maybe you want something simpler, or maybe you just want to own your numbers. So you click around, pick a shiny new tool, and then it hits you. What happens to years of data sitting inside your old account? Do you just walk away from it?
Here is the kicker. Most people switch tools and lose their history in the process. They start fresh with a blank dashboard and no way to compare last year to this year. That is a painful trade-off, and it is completely avoidable.
Let’s break this down together. This guide walks you through how to export Google Analytics data before you switch, so you keep your history and start your new tool with a clean conscience.
Why You Should Export Google Analytics Data Before Switching
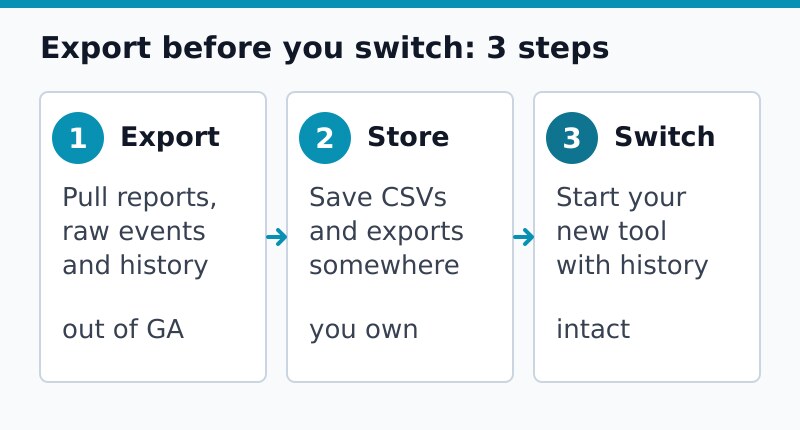
Your analytics account is more than a dashboard. It is a record of how your audience grew, which campaigns worked, and which content quietly carried your traffic for years. When you cancel or abandon an account, that record can become hard to reach.
There are three solid reasons to pull your data out first:
- Historical comparison. Year-over-year context is gold. Without it, you cannot tell whether a slow month is normal or a real problem.
- Data ownership. Once the data is on your machine, no platform decision can take it from you. That is the whole point of escaping vendor lock-in.
- Reporting continuity. If you build reports for clients or stakeholders, a sudden gap in the timeline looks sloppy. Exported data fills it in.
That said, you do not need to hoard everything. The trick is exporting the data that actually matters and skipping the noise. We will get to that.
What You Need Before You Start
Before you export anything, gather a few things. This keeps the process smooth instead of stop-and-start.
- Admin or editor access to the Google Analytics property you want to export.
- A clear date range. Decide how far back you want to go. Most sites benefit from grabbing the full lifetime of the property.
- A storage spot. A folder on your computer, a spreadsheet tool, or cloud storage. Somewhere stable and backed up.
- A short list of priority reports. Think traffic sources, top pages, conversions, and audience overview. We will expand on this below.
Before you commit to a new platform, it also helps to have a measurement plan in hand. That way you know which historical metrics are worth carrying over and which ones you can happily leave behind.
Step 1: Decide Which Reports Actually Matter
Here’s the thing. Google Analytics can generate hundreds of report combinations. Exporting all of them is a waste of an afternoon. Instead, focus on the handful that tell your site’s real story.
For most sites, the core exports are:
| Report | Why Keep It |
|---|---|
| Traffic acquisition | Shows where visitors came from over time |
| Top pages | Reveals which content earned the most attention |
| Conversions / key events | Records what your visitors actually did |
| Audience overview | Captures totals like users and sessions per period |
| Landing pages | Helps you spot your best entry points |
If you track ecommerce events, add your product and revenue reports to that list. Those numbers are hard to reconstruct later.
Step 2: Export Reports Manually From the Interface
The simplest method needs zero code. Open any report inside Google Analytics, set your date range, and look for the share or export option near the top of the report. From there you can usually download as a file you can open in a spreadsheet.
A few practical tips for this approach:
- Export in chunks. Pull data month by month or quarter by quarter. Huge ranges can get summarized or sampled, which we will explain in a moment.
- Choose a spreadsheet format rather than PDF when you can. Spreadsheets let you analyze later. PDFs only let you look.
- Label your files clearly. Something like
traffic-sources-2024-q1.csvbeatsexport(3).csvevery single time.
Manual exporting is fine for small sites. For larger accounts with years of history, it gets tedious fast. That is where the next step comes in.
Step 3: Use Spreadsheets and Connectors for Bulk Data
If clicking through dozens of reports sounds miserable, you have options. Google offers a Sheets add-on that pulls analytics data directly into a spreadsheet on a schedule. You define the metrics and dimensions once, and it does the fetching.
For the technically inclined, the official reporting API lets you script exports and store the raw output wherever you like. This is the most flexible route, though it asks for some setup. The Google Analytics developer documentation covers the available methods.
Whichever route you pick, the goal is the same. Get the raw rows out of Google’s servers and onto storage you control.
Step 4: Watch Out for Sampling and Data Limits
Here is a trap that catches a lot of people. When you ask Google Analytics for a big date range with lots of detail, it sometimes returns an estimate based on a sample of your data rather than the exact numbers. That means two exports of the same period can disagree.
To keep your exported data trustworthy:
- Narrow your date ranges so each export pulls fewer rows.
- Reduce the number of dimensions in a single report. Simpler reports are less likely to be sampled.
- Watch for any sampling notice the interface shows, and treat sampled numbers as approximate.
If exact accuracy matters and the numbers keep shifting, that is a strong signal you are looking at sampled data. We dug into why your reports can show different numbers in a separate guide on analytics sampling.
Step 5: Organize and Store Your Exports
Exporting is only half the job. If your files end up scattered across a desktop and three download folders, you have not really preserved anything. Build a simple, boring structure that future-you can navigate.
- Create one parent folder named after the site and the export date.
- Group files by report type, then by time period.
- Keep one summary spreadsheet that lists every file and what it contains.
- Back the whole folder up somewhere off your main machine.
Once that is done, you can start your new tool with confidence. Your history is safe, and your fresh dashboard is not a leap into the unknown. If the destination is still undecided, our side-by-side of six privacy-first analytics platforms narrows the field — including which of them will let you export everything again later.
Common Mistakes to Avoid
- Waiting too long. If you let an account lapse, access can disappear. Export while you still have the keys.
- Exporting only summaries. Pretty charts are nice, but raw rows are what let you analyze later. Keep the data, not just the picture.
- Ignoring conversions. Traffic is easy to recover roughly. Conversion history is not. Prioritize it.
- Forgetting the backup. One copy on one laptop is not a backup. It is a single point of failure.
Frequently Asked Questions
Will my new analytics tool import the old Google Analytics data?
Usually not directly. Most platforms start collecting fresh from the day you install them. That is exactly why you export and store the old data yourself. You keep it for reference rather than expecting the new tool to absorb it.
How far back can I export?
That depends on how long the property has been collecting data and the retention settings on the account. Check your data retention window, then export the full available range before anything expires.
Do I need technical skills to export Google Analytics data?
Not for the basics. The manual export option inside the interface needs nothing but clicks. Connectors and the API are there for larger jobs, but plenty of site owners get everything they need through manual exports.
Bottom Line
Switching analytics tools should feel like an upgrade, not a loss. When you export Google Analytics data first, you keep your history, protect your reporting, and own your numbers no matter which platform you land on.
No fluff, just straight answers. Here is the short version:
- Export before you cancel so you never lose access to your records.
- Focus on core reports like traffic, top pages, and conversions.
- Mind the sampling by exporting in smaller, simpler chunks.
- Organize and back up so the data is usable years from now.
Spend one focused afternoon on this, and your escape from Google Analytics becomes a clean break instead of a leap of faith. Your future reporting self will be grateful.

Leon Bauer
Explorer of web analytics and digital measurement tools. I dive deep into features, limitations, and use cases of platforms like Google Analytics, Matomo, Plausible, and others. My mission is to demystify analytics through honest reviews and practical guides.
More about me →